
Remember how we talked about the fs module for Node in the introduction? We saw that it was capable of reading html and plain text–however fs is capable of so much more.
What can we do with fs?
There are a multitude of things node’s file system module can do. Tt’s main uses include:
- Reading files
- Creating files
- Updating files
- Renaming files
We’ve already somewhat covered how to read files within our previous http module demo! Now why don’t we look into how to create files using fs.
Creating Files
Now that we know of the primary uses for Node’s file system (fs), let’s get started with something simple; making a file!
Let’s start off by importing our module into our app,js file. If you remember from last time, we do that with the
const fs = require(`fs`); command.This includes the fs module in our node app and allows us to work with the files!
Now that we’ve done this, the rest is pretty straightforward.
We start off by first calling a method from the fs module called
fs.writeFile(). The brackets here take up 3 different parameters;

- The path to the file, usually the file name or url – if there is no matching file it creates a new file under the specified name and content
- The content that the user wants written to the file that comes in the form of a string, Buffer, TypedArray or DataView (we will only be covering the form of strings)
- Encoding type – if none is given, it defaults to utf-8
- What to do in the case of an error
So, let’s put some content in! The steps are:
- We want to name our file. In this example the name is test.txt
- Next we want to state our content. Our example uses ‘C4T is awesome!’.
- We define our encoding type to utf-8.
- Finally, our error checking:
- We’ll just write a quick if statement using arrow functions (as you’ve learned in the javascript course) that says if an error is detected, return it to the console.
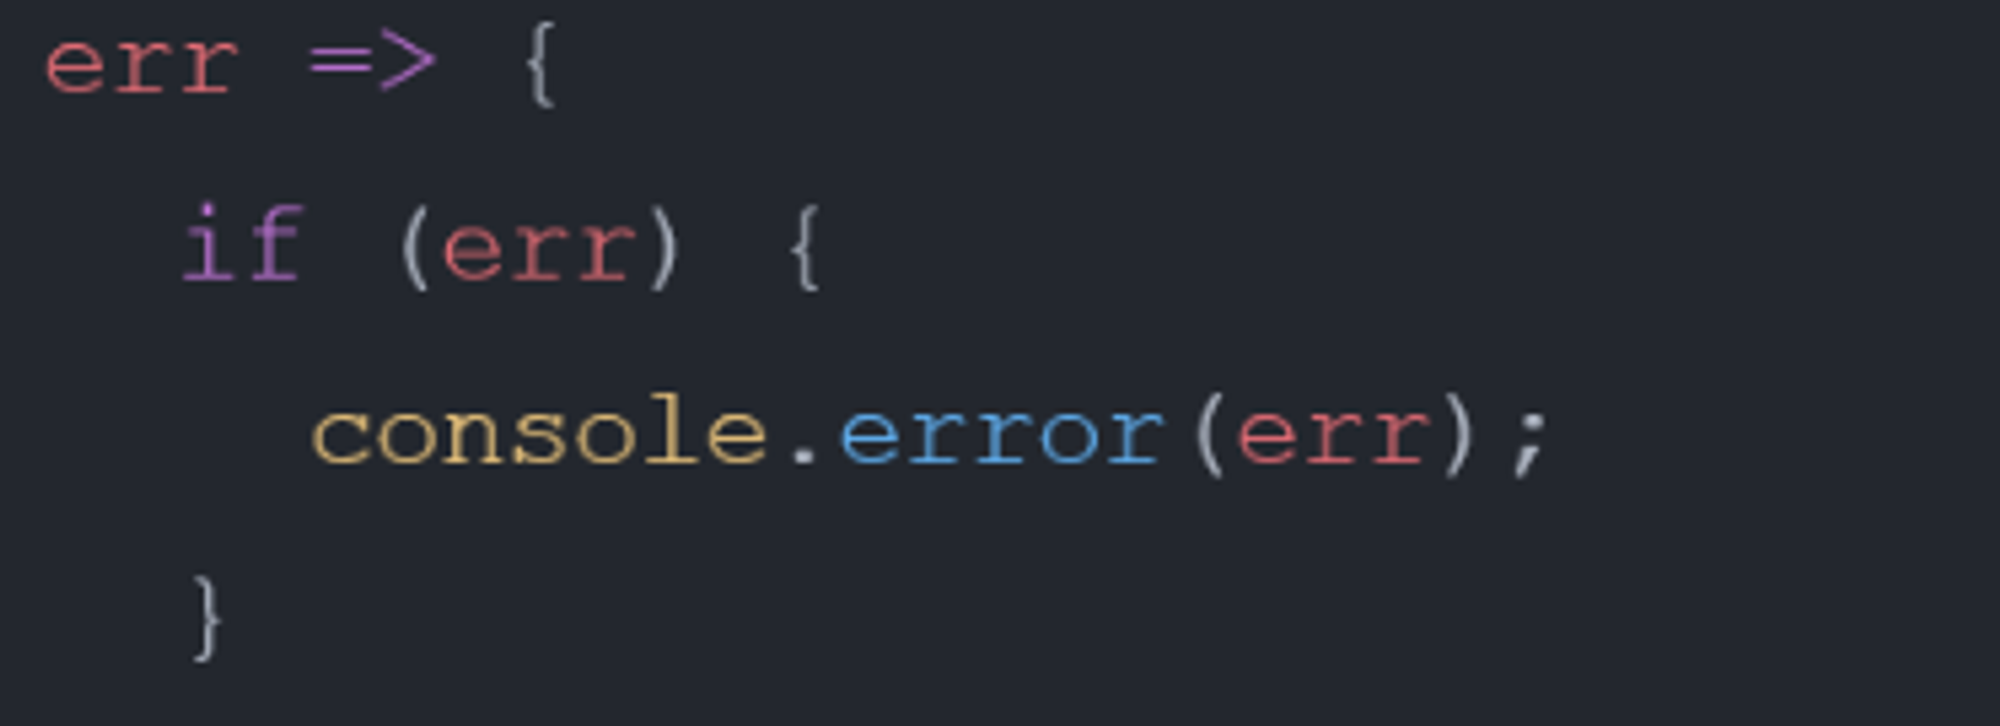
Now we can put everything we’ve coded and put it together:


And that’s it! Our first file! Opening it looks like this:

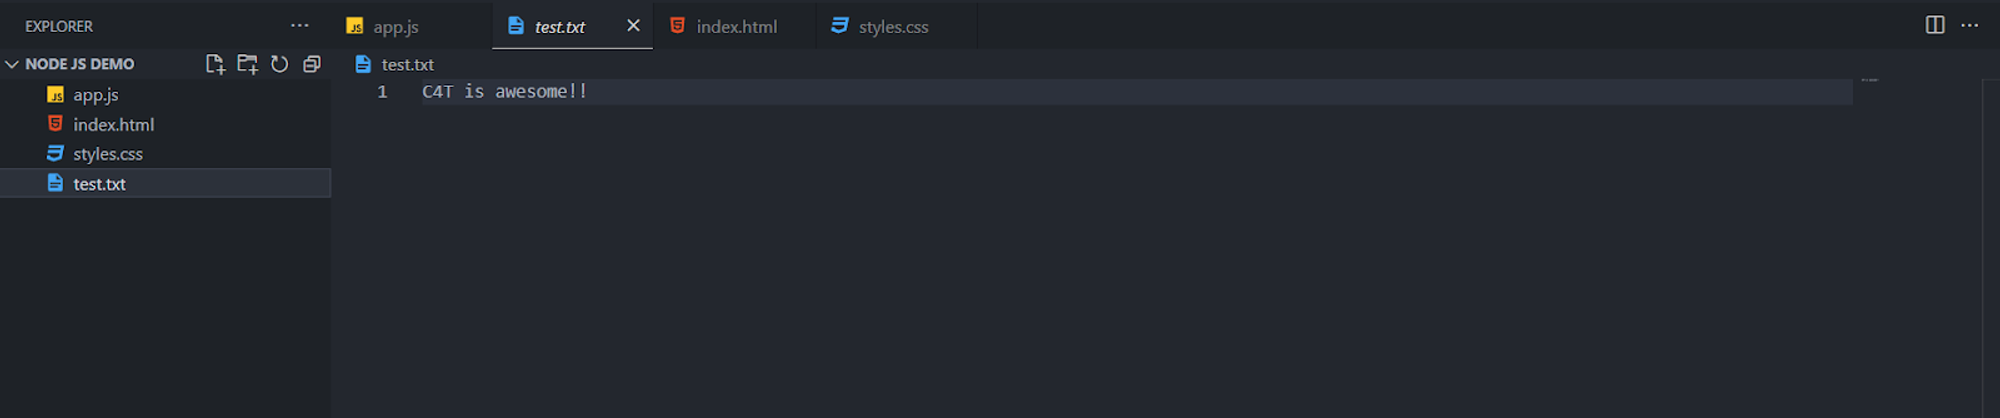
.
Do keep in mind that if you use the name of a file that already exists, it erases the aforementioned file and rewrites it!
With this basic setup, we can’t write complex files (e.g, pdfs) but we can write basic text, and with the use of other modules, we can even write much more!
Now, why don’t we try incorporating this into our old http module code to make a basic application that writes and outputs a file to html!
All we have to do is call on the file name in our original code in the fs.readFIle() function, and we’ll get a text file printed on our webpage!


Now that should produce something along the lines of:


Awesome! we got ourselves a pretty basic node js server, with our own file on it.
Now let’s get to modifying these files without having to completely rewrite them every time.
Editing Files
The good news first, or the bad news?
The good news: You can edit specific characters / words in a file using node’s fs module.
The bad news: You can’t add in new lines or add in new content, only replace existing content with the fs module.
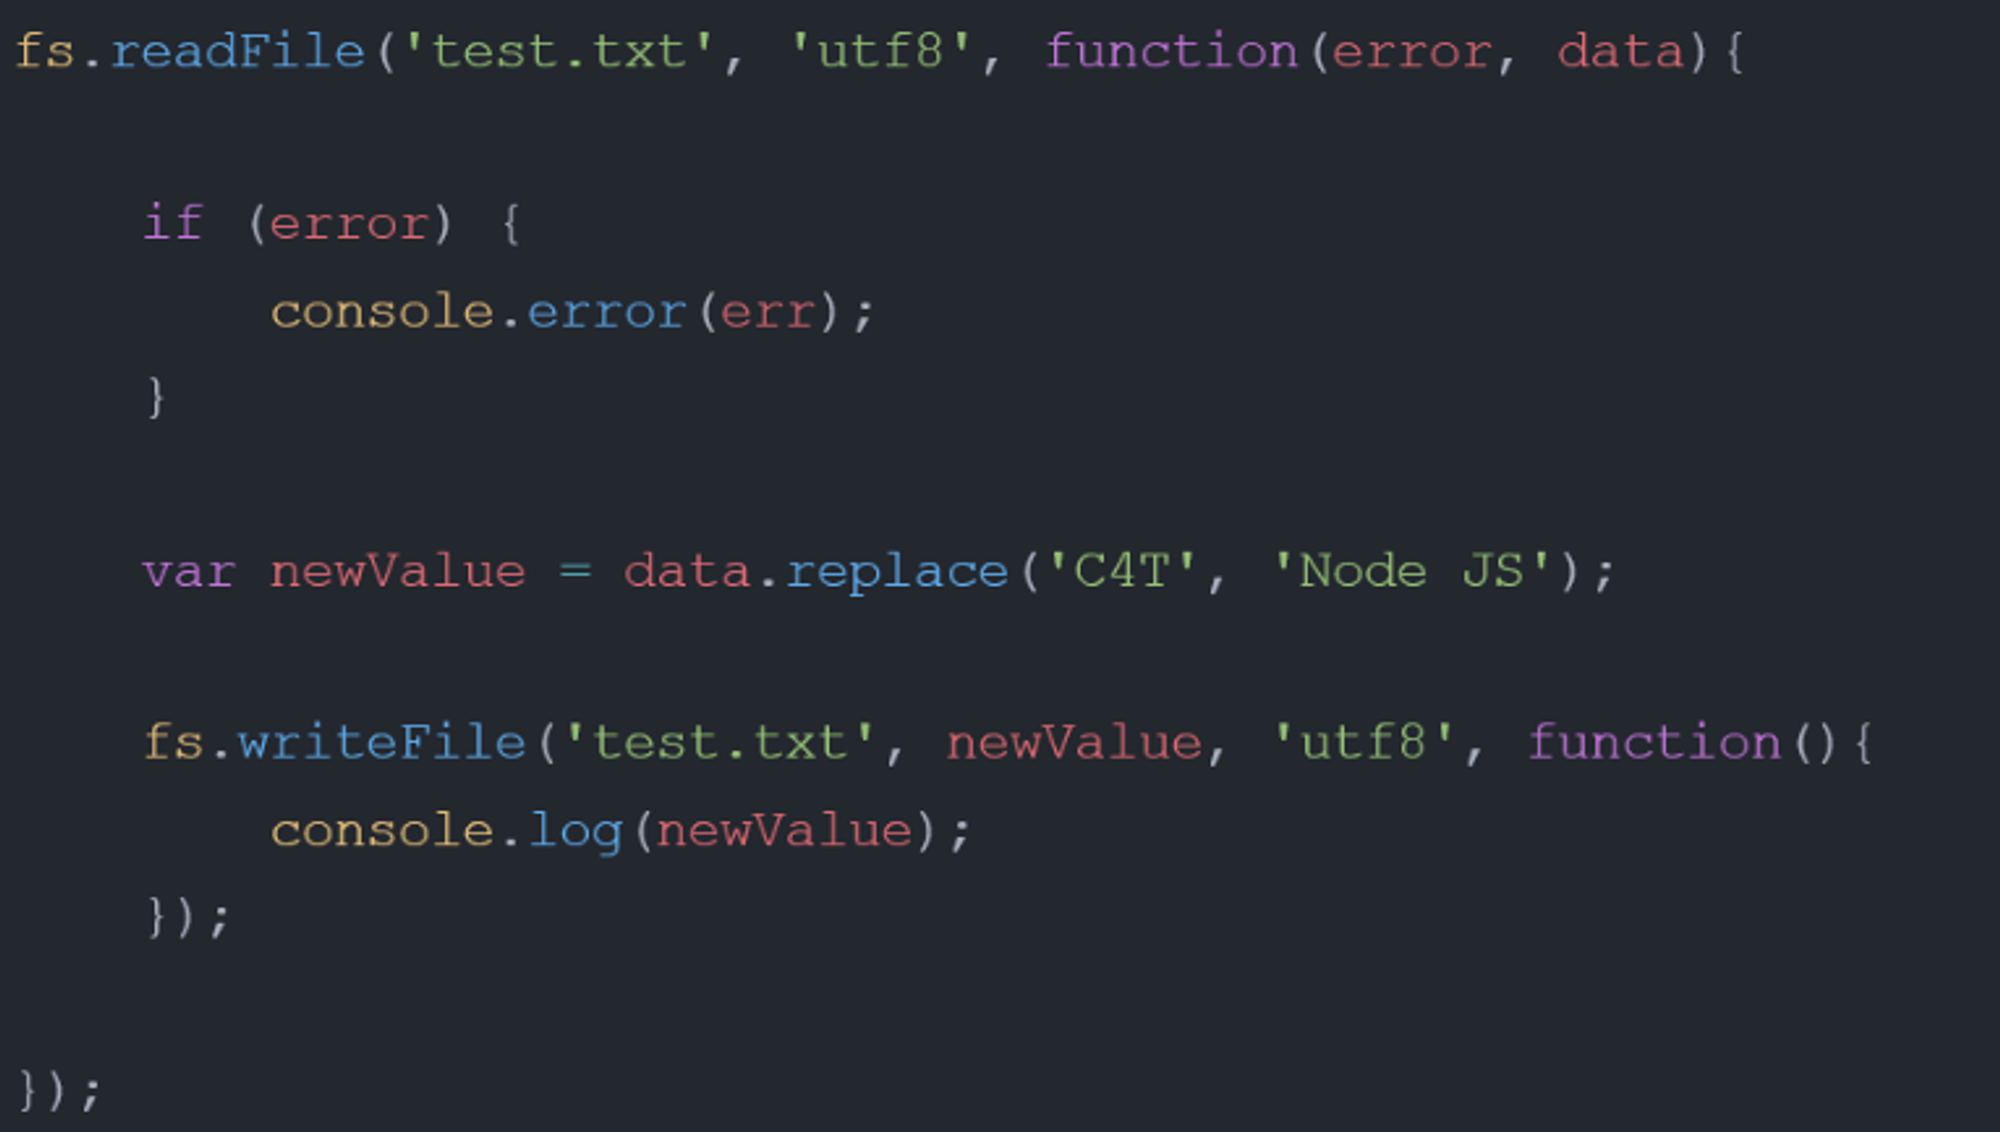
Replacing content is not very complicated; it starts off with reading the original file first, as we previously did, however we’re going to do something different this time around, we’re going to define a traditional function instead of a shorthand
=> symbol.To do this, we do the first line as usual, except at the end we add
function(error, data){ instead of simply function(error) {.This takes in our read file content as a data variable, and the error as the error variable.
As usual, we add in our error checking if statement:
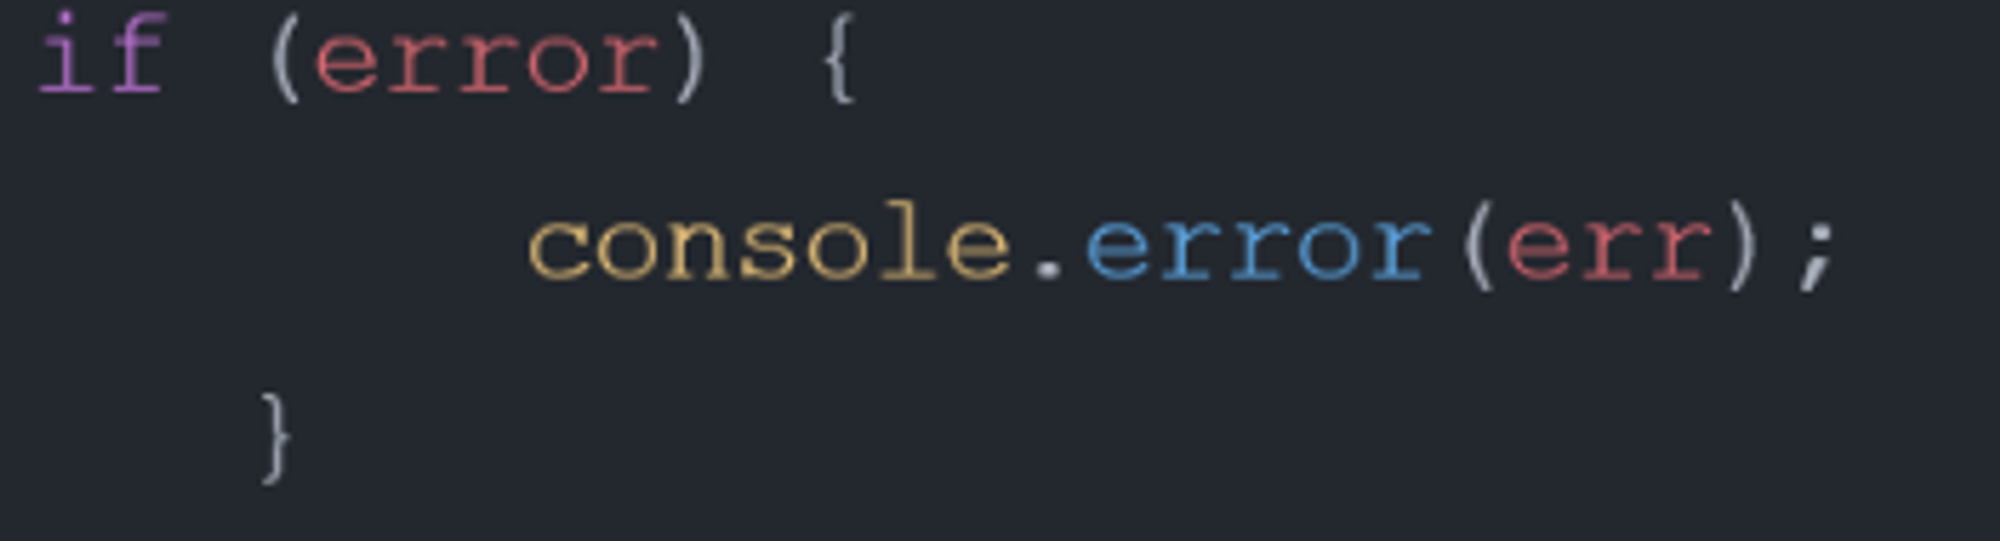
We will now introduce our first new method,
data.replace(). This command duplicates the content, then replaces one thing in the file with another.For example:

This declares a new variable called
newValue, and we add in our data and the data.replace command. This command takes 1 string parameter (in this case ‘C4T’), and replaces it with the following string parameter (in this case, ‘Node JS’).Warning! Don’t do:
data.replace('C4T', 'Node JS') + data. It re-adds the original file data with the replaced file data, creating a duplicate string)Finally, we write the variable to the file like this (with a function(), to make sure we know what it write to the console):

With everything put together, here is what our code should look like:
Now we are finished learning the basics of writing, editing and reading files! With these out of the method, we should complete the set by learning how to delete and rename files.
Rename Files
Renaming files isn’t going to involve all that much coding. All we have to do is call the fs.rename()function.
This function takes in 3 parameters:
- The original file name
- The new file name
- Another function
- This function is reserved for the error function,
function (err)
With all these in order, we add in our quick if statement to print out any errors to the console. This wraps up all our code to rename files!
In the following example, the original file name ‘copy.txt’ is renamed to ‘chant.txt’. It resembles something like this:

Copyright © 2021 Code 4 Tomorrow. All rights reserved.
The code in this course is licensed under the MIT License.
If you would like to use content from any of our courses, you must obtain our explicit written permission and provide credit. Please contact classes@code4tomorrow.org for inquiries.