
Let’s dive straight in!
So, now that we’ve covered the basics of Node, let’s jump into practical use: setting up a makeshift server to run our html code.
The process of doing this is very simple. All you need is a bit of Javascript knowledge, 2 node js modules and some creativity!
Since Node js is simply an environment built off of Javascript, we’ll start off with a new javascript file. For this example we’ll name it app.js”.
To set up an http server, we’ll need to import the http module from Node. This will help us spin up our local host server.
To include a library in Node js, we simply use the `require` keyword containing the library name in a string. In this case, to import the http library we would use:

Now we have to define a port that node will be listening to. The port number must be in the range 2-65535 as 0, 1, and anything past 65535 is not recognized by Node as ports. You can choose to define the port as a variable prematurely for easy switching or define it later on when it is necessary. For example, defining the port 80 looks like:

Now, in order to render a file we are going to need to use the fs, or the File System module, in order to parse the file and write it to the node http server. The import process for the File System module is identical to that of the http module:

Now that we have all our modules, let's get started with the actual code.
First, we create a server using the http module with the command
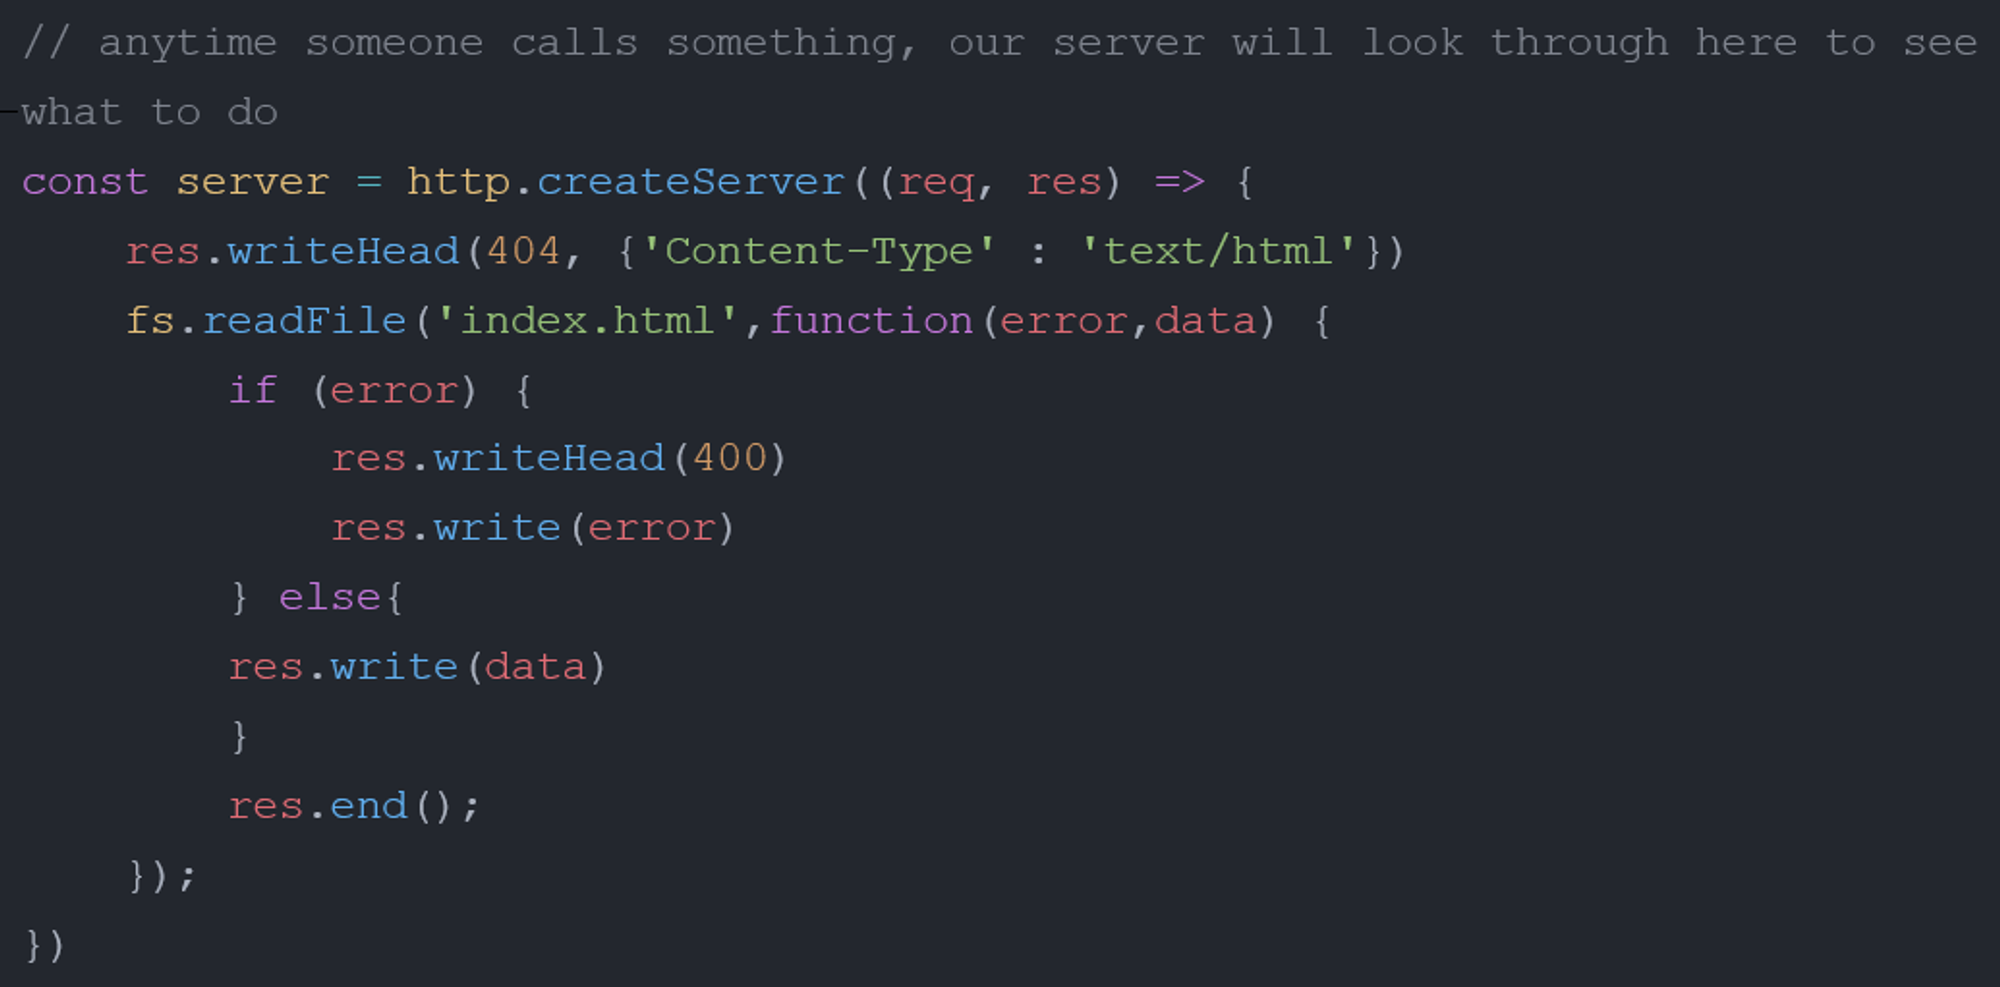
http.createServer. In the example, we stored this server inside a new object called server.This will look something like this:

However, you will notice that this won’t generate anything. This is because our server needs to listen to and receive requests to generate responses. In order to implement this, we need a function defining what requests to take and responses to make. In this example, we use an arrow function expression that takes the 2 parameters requests and responses.

Now that we have our request and response defined, let’s call the
writeHead method which defines the content type and the status code. Status codes are universal 3 digit web dev codes sent to the browser which give it information on the status of the server's response. For example, status codes could be any of the following:
Informational responses (100 – 199)
Successful responses (200 – 299)
Redirection messages (300 – 399)
Client error responses (400 – 499)
Server error responses (500 – 599)This is the code that a user sees when a website refuses to connect, or a page doesn’t exist (Think 404 error message).
We want our server to transmit a message stating that all our code is good, so we’ll send a success response: 200. The second parameter is the content type, namely text and html. Our code segment should look something like this:

Now to actually read our html file we must call on our trusty fs module. In order to read an html file, we simply call the command,
fs.readFile(‘filename.extension’).However, we would also like to define a function that checks for and manages errors. For this we incorporate a function inside the readFile() command when we run our html file. So our code should look something like this:

Inside this function, we must write what to do in case of an error. This is a simple if statement; if we’re given an error, we write the status code
unsuccessful (400-499) to the console. Otherwise, we may write the data we’ve read to the webpage.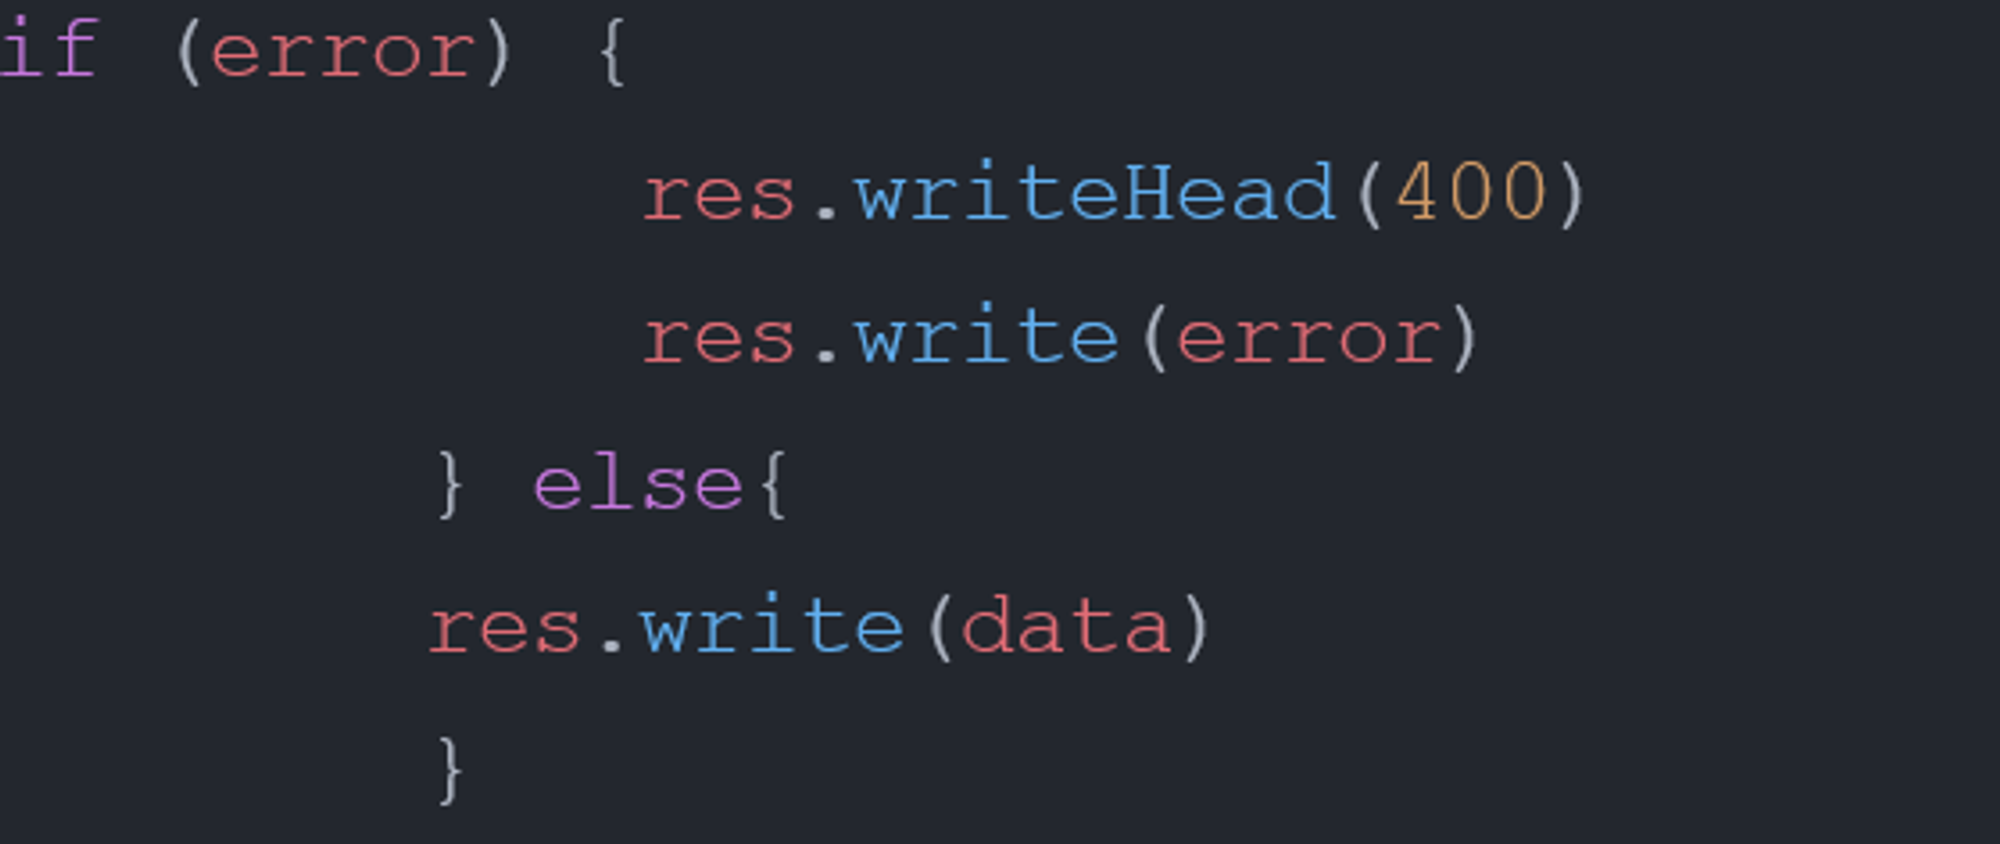
Finally, now that we don’t have any new info to write into our webpage, we simply have to tell node we’re done. Here we write res.end(), denoting we won’t be writing anything more to the webpage. Without this line of code, our browser will continue loading endlessly.
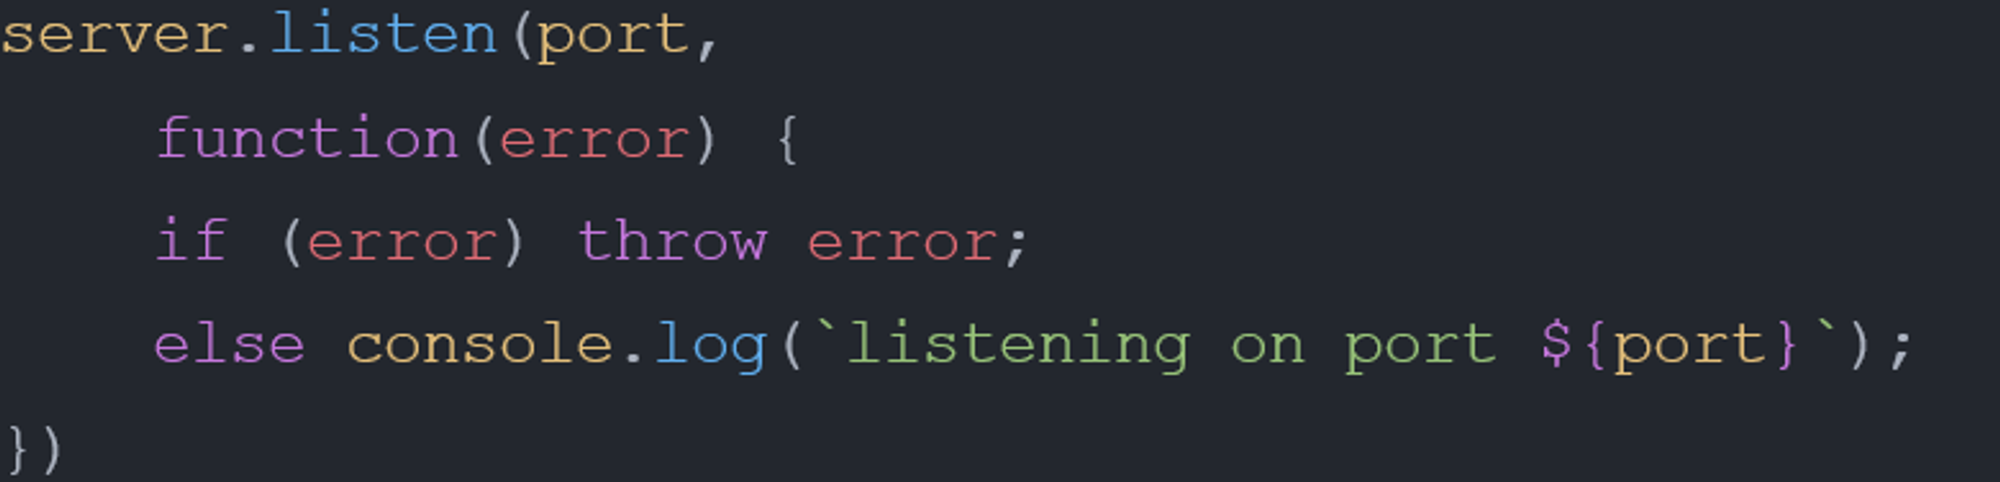
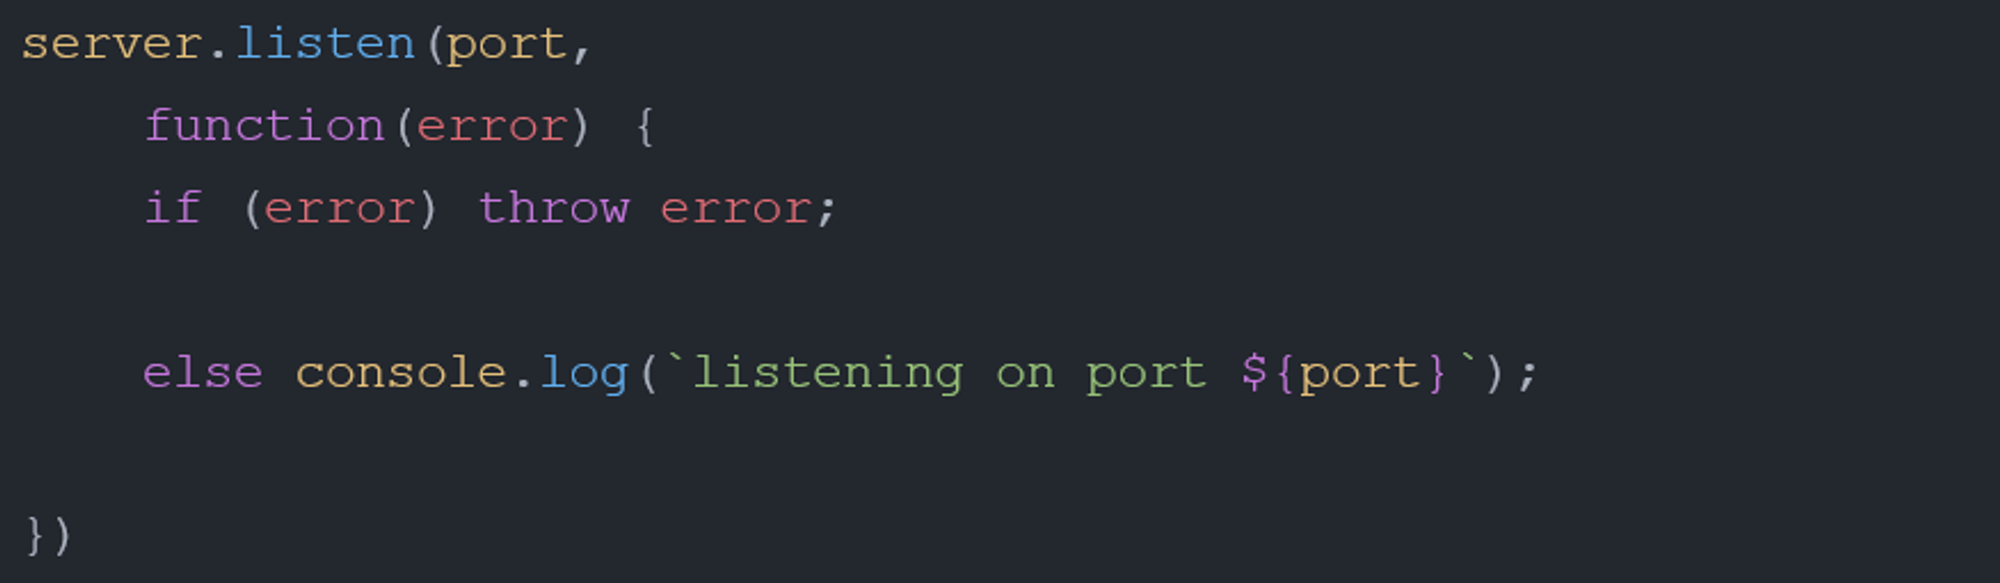
Now to make the server listen to our preferred port. For this we call our server object and the listen method, to which we will provide a port value. We also write a short function on what to do if an error is detected. This is something along the lines of:
Putting everything together, we have something like this!:

In order to access this server, we have to open up a new terminal session and type
innode [file-name].js
And this should print out whatever your preferred message for a successful port was.


To access this, simply open up any browser (on your computer), type in
localhost:[port-number] and hit enter. This should end up loading your html file!

Note: https does not support separate css and js files in the html, which means it’s not very efficient and in order to incorporate these assets, you will need to use <style> and <Script> tags as a replacement.
Treat yourself, you have made your first server with node js!
Copyright © 2021 Code 4 Tomorrow. All rights reserved.
The code in this course is licensed under the MIT License.
If you would like to use content from any of our courses, you must obtain our explicit written permission and provide credit. Please contact classes@code4tomorrow.org for inquiries.